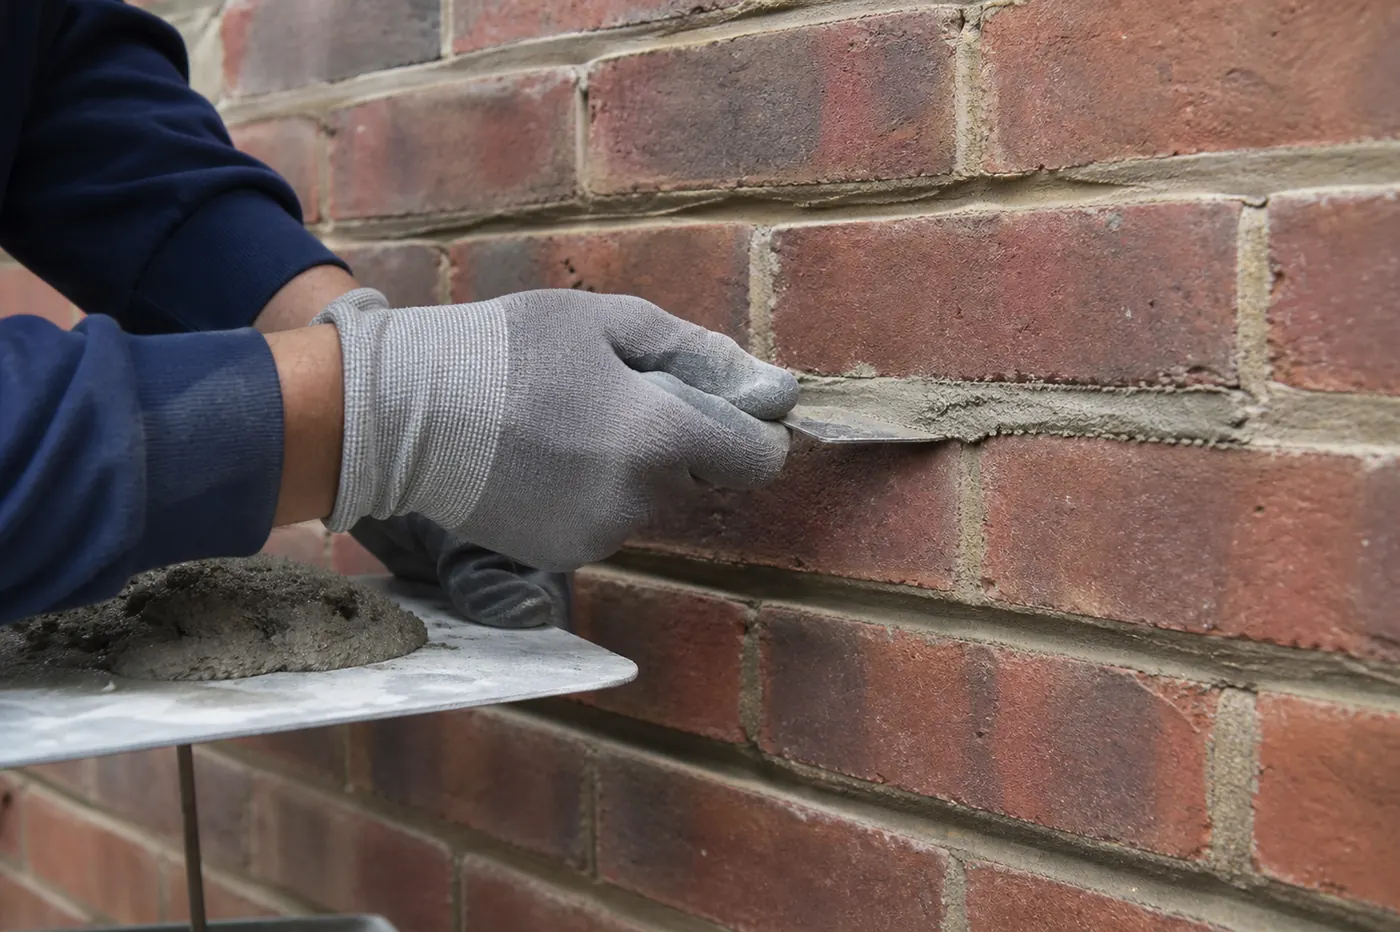
Repointing, also called tuckpointing, costs $300 to $700 for a partial job and $700 to $2,500 for a full one on a Boston chimney. It means cutting out worn mortar and packing in fresh mortar so the joints shed water again. A $49 inspection measures how much mortar has failed, and that $49 is credited toward the work if you approve it.
- Repointing in Boston is $300 to $700 when a few areas need it and $700 to $2,500 when joints are worn out across the stack.
- The old mortar is cut out to a sound depth first. Smearing new mortar over a weak joint does not last.
- Mortar is the part of a wall meant to wear. Renewing it protects the brick.
- The $49 inspection is credited toward approved work, and you get a written price before any mortar is touched.
What repointing and tuckpointing actually do
Between every brick in your chimney is a joint of mortar. The joint does three jobs. It holds the bricks apart at an even spacing, it passes weight from one brick to the next, and it sheds rain so water runs off the wall instead of soaking in. When mortar wears back or cracks, the wall loses all three.
Repointing is the repair for that. The tired mortar is removed from the joint to a set depth, and fresh mortar is pressed in and shaped. The word tuckpointing is used for the same family of work, and on most Boston houses people use the two words as one. What matters is the method: remove, refill, tool, and leave the brick alone.
Mortar is meant to be the weak point. It is softer than the brick on purpose, so that weather wears the joint instead of the brick, and so that the joint can be renewed. Repointing is how a brick chimney is kept going rather than replaced. If the bricks themselves are breaking, you want the masonry repair page instead, and the two jobs are often done together.
Signs your mortar joints are due
Mortar fails slowly, so the early signs are easy to miss. Look for these six.
- Joints that are recessed or missing. The mortar sits well back from the brick face, or there is an empty slot with no mortar at all.
- Mortar that crumbles under light pressure. If a key or a fingernail can scrape it out, it has lost its strength.
- Hairline gaps along the brick edges. A thin dark line where mortar has pulled away from the brick lets water slip in.
- Plants or constant dampness in the joints. Moss, small weeds or a joint that stays dark long after rain show that it holds water.
- Old repair mortar coming loose. A thin band of earlier pointing, sometimes called ribbon pointing, that is lifting away means the last job was shallow.
- Open joints inside the firebox. Gaps between sound firebrick or brick let heat and smoke reach places they should not.
Grit on the ground below the chimney, or a sandy layer on the roof near it, is a late sign. By then a good amount of mortar has already left the wall. If you see one of the six signs, it is worth acting while the brick edges are still sharp and whole, because that is when repointing is the full answer rather than a first step toward something larger.
Why a Boston winter wears out chimney mortar
A chimney has no overhang, no gutter and no siding to protect it, so every joint takes direct weather. Rain and melting snow soak into worn mortar, and when the temperature drops the trapped water freezes and expands. In a place with many freeze-thaw cycles each winter, even a thin gap grows deeper.
Wind-driven rain makes it worse. Nor'easters push water sideways into the joints on the exposed faces, and coastal salt air adds to the wear. The faces that take the most weather tend to go first, which is why a chimney can have good mortar on one side and poor mortar on another.
Once joints are open, the brick edges begin to take water as well. That is how a mortar problem turns into a brick problem, and it is the main argument for repointing before the bricks are damaged. Mortar is the cheaper part to renew.
What the technician checks before deciding on repointing
The visit is meant to answer two questions: how much mortar has failed, and whether the brick behind it is sound enough to hold new mortar.
Depth and area of the damage
The technician probes the joints to see how far back the weak material runs. A joint that is worn only on the surface needs less cutting than one that crumbles an inch in. The areas affected are noted face by face, which tells you whether the work is partial or full.
Mortar failure or brick failure
New mortar in a joint between broken bricks will not hold. If bricks are cracked or flaking, they have to be replaced as well. The inspection separates the two so the quote lists each one.
What was done last time
Many older chimneys have been patched. A grey, hard mortar next to soft old brick, or a thin skin of filler over an open joint, is easy to spot once you know to look. These earlier repairs may have to come out, and they affect how much work is needed.
Colour and joint profile
Joints come in different shapes, such as flat, concave or raked, and mortar comes in different colours and textures. The technician looks at the existing joints so the new ones can blend in and not look like patches.
How repointing is done, step by step
Good repointing is mostly preparation. The pointing itself takes little time compared with the cutting out.
- Protect the surroundings. Roof surfaces, siding, windows and any finished masonry nearby are covered so dust and mortar do not mark them.
- Cut out the old mortar. Loose mortar is removed from each joint to a sound, even depth. Cutting to a uniform depth gives the new mortar something solid to bond to. Care is taken not to chip the brick edges.
- Clean the joints. Dust and crumbs are cleared out. Damp brick takes mortar better than dry, so the joints are prepared before filling.
- Pack the new mortar. Mortar goes in in thin layers, called lifts, and each layer is pressed firmly into the one before it. Filling a deep joint in one pass leaves voids.
- Tool the joint. Once the mortar has firmed up, it is shaped to match the profile of the surrounding joints, which also compacts the surface.
- Clean the brick. Excess mortar is brushed off the faces before it sets.
The order of work matters because dust from cutting would spoil fresh mortar, so each area is cut, cleaned and filled in turn. Weather decides the pace. Mortar needs mild, dry conditions to cure well, and a hard freeze or heavy rain can force a delay. That is one reason a start date can move.
Matching the mortar so the repair blends in and lasts
The new mortar has to suit the old wall in three ways: strength, colour and shape. Get one wrong and the repair either fails early or stands out for as long as the chimney does.
Strength
The golden rule is that the mortar should be softer than the brick, or at the very least no harder. Older Boston brick is often soft, and so the mortar chosen for it should be soft too. That way, when frost and water do their work, the joint takes the wear and the brick stays whole.
Colour and texture
Mortar is mixed with sand and, in some cases, pigment. The grain of the sand and the tone of the mix change how it looks next to the old joints. A representative sample is matched against a clean, protected piece of the existing wall, not against a weathered or stained one, because the stained one will mislead.
Joint shape
Each wall has a profile: flush, concave, struck or something else. The new joints follow it. A concave joint is common because the curve sheds water well, but the right answer is whatever the original wall has. Changing the profile changes how the wall looks and how it drains.
It is fair to ask the technician to explain the mortar choice in plain words. A clear answer about strength, colour and shape is a good sign. A vague answer is a reason to ask again.
Partial repointing or full repointing
The decision rests on how widespread the failure is, not on how bad one spot looks.
Partial repointing
This fits a chimney where the damage is limited to one elevation, one corner or a particular height, and the rest of the joints are in good shape. Only the failed areas are cut out and refilled. It is the smaller price band, and it is a good fit when an inspection finds one weathered face and three healthy ones. Even then, the technician should tell you which other areas are close to needing the same work, so you can plan for it.
Full repointing
This fits a chimney where joints have worn out broadly. Repointing half a face when the other half is nearly as weak just moves the problem a few feet. When most of the mortar is past its useful life, the whole stack above the roof is done so that it ages evenly.
Firebox joints
Inside the firebox, joints between the brick or firebrick can open from heat and age. These are filled with a material that is rated to take the heat of a fire, not ordinary wall mortar. Ordinary mortar in the wrong place breaks down quickly. If the firebox itself has deeper damage, the firebox repair page covers that.
Repointing versus other jobs
Repointing is not a cure for everything that looks like mortar trouble. These are the cases where another job is needed, or needed as well.
- Bricks are the problem. If faces are flaking or cracked, the bricks need replacing. Repointing around broken bricks leaves the real weakness in place.
- The water starts higher up. A cracked crown or failed flashing can soak the joints from above. New mortar under a leaking crown gets wet and fails again.
- The wall has moved. A leaning stack or a crack that keeps widening is a structural question. Repointing is not an answer for it, and the chimney rebuild page explains the next step.
- The surface just needs water protection. After repointing, some owners add a breathable water repellent. That is a separate item, described on the chimney waterproofing page.
The written scope should say which of these applies. If the plan is only to repoint and the inspection found a cracked crown, ask why the crown is not on the list.
Quick fixes that fail, and what to ask when comparing quotes
Some products and methods look cheaper and give a short-term result. Knowing how they fail helps you avoid paying for them.
Surface smearing
Spreading mortar or caulk over an open joint looks neat for a season. It has nothing deep to grip, so it cracks and drops out, often taking part of the brick edge with it.
Hard cement on soft brick
A dense, strong mix seems like a good idea until you realise the old brick is softer than the mix. Water then leaves through the brick face instead of the joint, and the brick flakes. The mortar should be no harder than the brick it joins.
Coatings over failed joints
A paint-like sealer over open joints can trap water inside. It hides the symptom and keeps the cause.
A proper job takes longer to prepare, and that is the difference you are paying for. If a proposal sounds too quick, ask what is being done about depth.
Two repointing quotes can look similar and describe very different work. Ask each one to put the following in writing.
- The elevations or faces included, and the height the work reaches.
- How deep the old mortar will be taken out, and how that depth is checked.
- What happens to cracked or flaking bricks found along the way.
- How the mortar will be matched for strength, colour and joint shape.
- Whether the crown, cap or flashing that could be feeding water to the joints are in the scope or left out.
If one quote is much lower than the other, check whether it cuts the old mortar out to a sound depth or simply fills what is there. The cheaper job is often the shallower one.
Repointing price and what is in it
Boston repointing runs in two bands. Where you fall depends on how much mortar must be replaced, how tall the chimney is, and how easily it can be reached. The exact figure is written down after the inspection. The details are on the repointing cost page.
| Job | Boston range |
|---|---|
| Partial repointing | $300 to $700 |
| Full repointing | $700 to $2,500 |
Replacing bricks, repairing a crown or fixing flashing are separate items and are quoted in writing after the $49 inspection.
Booking, preparing and when not to wait
Call (617) 404-9587 or use the contact page. You will have a 3-hour arrival window and a call ahead. After the inspection you receive photos and a written price, and nothing is done until you approve it.
Preparation is light. Keep cars away from the base of the chimney and move patio furniture or plants that sit directly below the work. Mention any dripping, stains or loose mortar you have seen, and show any past repair paperwork. Mortar work is dusty on the outside, so close windows near the chimney on the day.
Plan for some noise and dust on the day, and expect the work to need access to the roof and the base of the chimney. Mortar loss tends to speed up once joints open, because water and frost now have an easy way in. Mortar or brick grit on the roof or the ground, or joints you can scrape out with a finger, are good reasons to book soon. If you suspect a chimney fire, leave the house and call 911. A carbon monoxide alarm is a reason to get everyone out and call 911, and a gas smell is a reason to leave and ring the gas utility or 911. Do not climb onto the roof to check the joints.
When you are ready to find out how much of your mortar is left, book the $49 inspection online or call (617) 404-9587.
Questions homeowners ask
Is tuckpointing the same as repointing?
In everyday use on chimneys, yes. Both mean removing old mortar from the joints and filling them with new mortar. Tuckpointing is sometimes used for work that also adds a thin decorative line, but the repair method you are paying for is the same.
How can I tell if my mortar is bad without going on the roof?
From the ground, look for grit on the lawn or patio below, for joints that look dark and hollow, and for plants growing from the stack. Inside, look for sand or crumbs in the firebox. The inspection confirms it, and you get photos of the joints.
Will new mortar look different from the old?
It can, at first. A careful job matches the colour and joint shape to the existing ones. New mortar often looks brighter until it weathers, so ask the technician to show you a sample or a finished test spot.
Can repointing be done in winter?
It depends on the weather, not the calendar. Mortar needs mild, dry conditions to cure. A hard freeze or a wet spell can delay the work, so dates are flexible and are confirmed with a call ahead.
Does repointing stop a leak?
If the leak comes through open joints, yes. If water enters through a cracked crown, bad flashing or a missing cap, repointing alone will not stop it. Tracing the water path first avoids paying for the wrong fix.
How do I compare two repointing quotes?
Ask each to state the area covered, how deep the old mortar will be removed, and what happens to damaged bricks. A quote that says only repoint chimney gives you nothing to compare. Photos from each inspection help.
Related guidance
Start with the Boston cost guide, then read the guides below.
- Crumbling Chimney Mortar in Boston: Causes and Fixes
- Chimney Tuckpointing Cost in Boston (2026)
- Masonry vs Prefab Chimney: How to Tell in Boston
- Repointing vs Rebuilding a Brick Chimney in Boston
- Freeze-Thaw Damage to Boston Chimneys: Signs and Fixes